I really like this site. I wish they had every product and service ever invented to mankind though.
THE BEST DEODORANT. Secret Clinical Strength!
http://www.consumersearch.com/deodorant
Wednesday, May 4, 2011
Monday, May 2, 2011
Sunday, May 1, 2011
Major Lazor Music Videos...
Funny great graphics.
Major Lazer feat. Mr. Lexx & Santigold - Hold the Line (Frikstailers Remix) from Frikstailers on Vimeo.
Pon De Floor featuring Afro Jack & VYBZ Cartel from Mad Decent on Vimeo.
Major Lazer "Keep it Going Louder" from Eric Wareheim on Vimeo.
Creating Halftone Effects in ILLUSTRATOR
Creating Halftone Effects
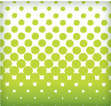
It used to be a time consuming process to create a halftone. First, I would open a picture in Photoshop, convert it to grayscale, apply a halftone effect, open it up in illustrator, trace it, and if didn’t get messed up somewhere in the process, I would use the halftone in Illustrator. In Illustrator CS3 it is quite a bit easier to create halftones without leaving Illustrator.
Notes
This tutorial was created with Illustrator CS3.I suggest having the Raster Effects at 300 ppi. This will generate the best quality in the effect. You can change this by going Effect > Document Raster Effects Settings and chose 300 ppi.
Halftones
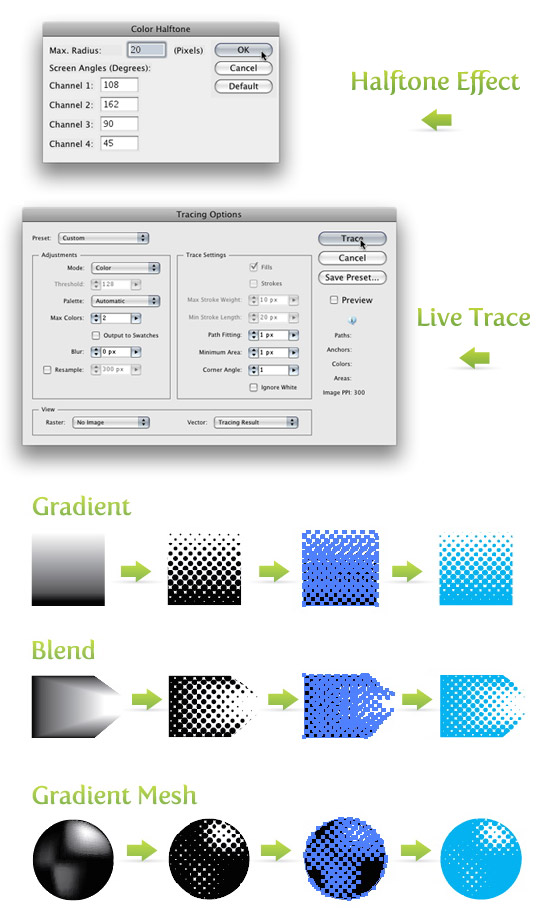
I don’t want to ramble on here, but it is helpful to learn a little about halftones before getting started. Basically, halftones simulate continuous tones with equally spaced dots of varying size. The eye blends these tiny dots into smooth tones. So anything created in Illustrator that contains continuous tone, can be simulated by a halftone. This includes gradients, blends, and gradient meshes. Moreover, you can apply halftones to photos.Color is also important to note when dealing with halftones. In addition to smooth tones, the human eye blends a limited palette of colors to create numerous colors in a halftone. It kind of works like the color mixer. A halftone mixes dots of Cyan and Yellow to create a green color, just like you mix Cyan and Yellow in your color mixer. If you use processed colors (like the green mixture of Cyan and Yellow) when creating your halftone it might not convert to vector gracefully. I suggest initially using black or spot colors in your halftone. After the halftone is converted to a vector you can change it to a process color (CMYK or RGB).
If any of this doesn’t make sense, just use black as the dark color and white as the light color in your gradients, blends and gradient meshes. After they are converted to vector, use any color you like.
Halftones from Gradients, Blends and Gradient Meshes
With your gradient, blend, or gradient mesh selected, go Effects > Pixelate > Color Halftone. Change the Max Radius to 20 and keep the rest of the settings the same. If the dots in the halftones are too small or too big, you can change the Max Radius by double clicking the Color Halftone effect in the Appearance Panel.Now you can trace the image to create vector art. Like the previous Grunge Text Tutorial, it is easier to work with the image once it is vector. Moreover, I am going to use the same settings in that tutorial.
First, expand the image by going Object > Expand Appearance. With the image selected, the Control Panel defaults to the Live Trace options. Click the Arrow Button beside the Live Trace button and select Tracing Options. If you wish, you can also go Object > Live Trace > Tracing Options. You don’t have to change all the options, just the ones below.
- Mode: Color (select if your object contains color, hopefully you are just using black and white)
- Max Colors: Dependent on how many colors you used,if any.
- Path Fitting: 1px
- Minimum Area: 1px
- Corner Angle: 1
- Ignore White: Check this box
Halftones from Photos
First, place a photo on the document by going File > Place and choose your photo. Once the photo is on the document, embedded it by pressing the Embed button on the Control Panel. Next, go Edit > Edit Colors > Convert to Grayscale. Now you can apply the same settings for the halftone effect and vector tracing as before. Again, you can always go back and change the Max Radius if the dots are too small or too big. Now it is really easy to spice up the halftone with color!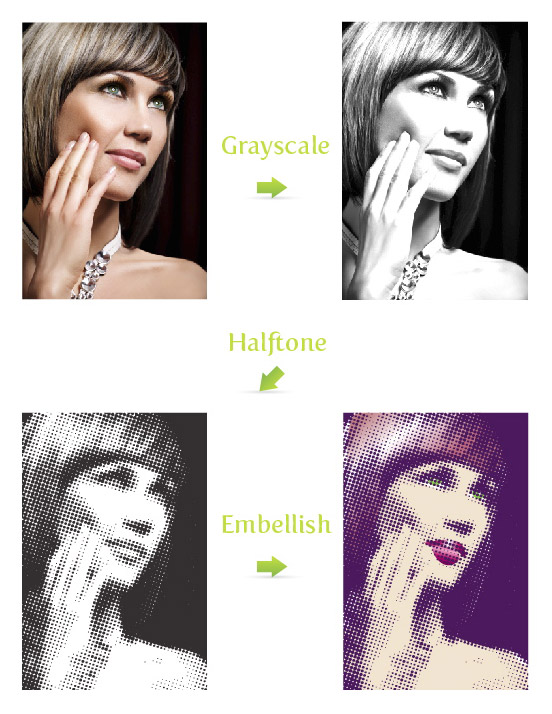
Halftone Swatches
If you want some more halftone options, check out the halftone swatches available in Illustrator. In my opinion these are not as versatile as the previous techniques, but they are worth exploring. To open these swatches, click on the pop-up menu in the Swatch Panel. Next, go Open Swatch Library > Patterns > Basic Graphics > Basic Graphics_Dots. The last five swatches in the set are the halftone swatches.
Experiment
Don’t stop there! Try playing around with the halftone settings or use the halftone effect on color photos and other vector objects. Below is an example of how I integrated these techniques into one of my illustrations.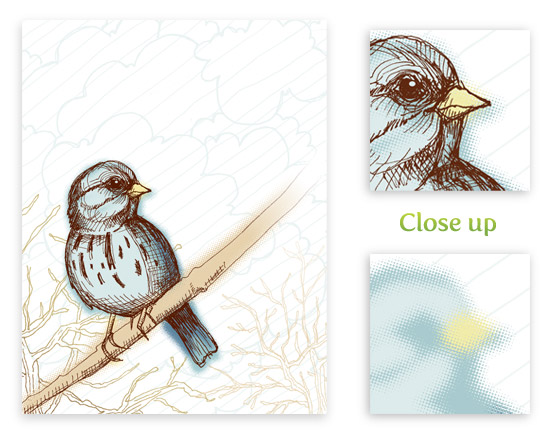
Update
There are many of you wondering if you can create these halftone effects with perfect circles in the halftone pattern. Unfortunately, with the techniques above, the circles in the patterns will never be perfect. However, there is an awesome Illustrator plug-in that can help in creating perfect halftone patterns called Phantasm CS. You might have already heard of this plug-in and if you have, you know about it’s unparalleled color adjustment tools. Now, Phantasm CS has added an amazing halftone tool! Phantasm CS now makes it super easy to create a perfect halftone effect. Moreover, you have total control over the halftone pattern. I advise any Illustrator user to buy the plug-in just for the color adjustment tools, but with the added benefit of the halftone tools, you would be crazy not to get this plug-in. I also suggest checking out the Phantasm CS Halftone tool demonstration video and learn about how powerful this tool is!

RESOUCE: http://vectips.com/tutorials/creating-halftone-effects/
Subscribe to:
Comments (Atom)